Before I began on this build, I wanted to review the Glock trigger system, just to be sure I was familiar with what I would be building. So here is a video that explains the Glock trigger pretty clearly. If you are going to build a Glock, this is a good place to start.
On opening the kit, I read through the instructions to make sure I had no questions, then I went in search of the instructional video. This was the best one that I could find:
The frame itself requires less than 10 minutes worth of work to be ready for assembly. I didn’t use a had drill. I have a drill press, and feel a lot more comfortable about drilling something like this with a press than I do with a hand drill.
When you need to remove the tabs, it’s easier to remove them before you put the frame in the jig. Make the cuts with hand cutters (I used a set of dykes and a pair of end cutters) then put the frame in the jig and smooth out the cuts with a hand file. I used a flat file with fine teeth, then polished it a bit with some fine grit sandpaper. It looks pretty good.
In all, the machine work took less than 20 minutes. It was MUCH less difficult and involved than doing an AR lower.
When it came to installing the parts kit, I hit a little bit of a snag. There were no parts kits available at 80percent.com, so I took a chance and ordered a PATMOS compact lower parts kit from Right to Bear. Cost $60
Because of that, the video from 80percent may not be as complete as you would like, but it is still a big help. I was worried that parts from two different suppliers would be a problem, but it turns out that it isn’t.
The only real snag here was in getting the pins in. A couple of tips: It was MUCH easier to insert a punch through the frame, trigger, and slide release from the left side of the frame, then insert the pivot pin from the right side of the frame. Using the punch as a slave pin and gently tapping the pivot pin with a non-marring hammer from the left was the easiest way to do it.
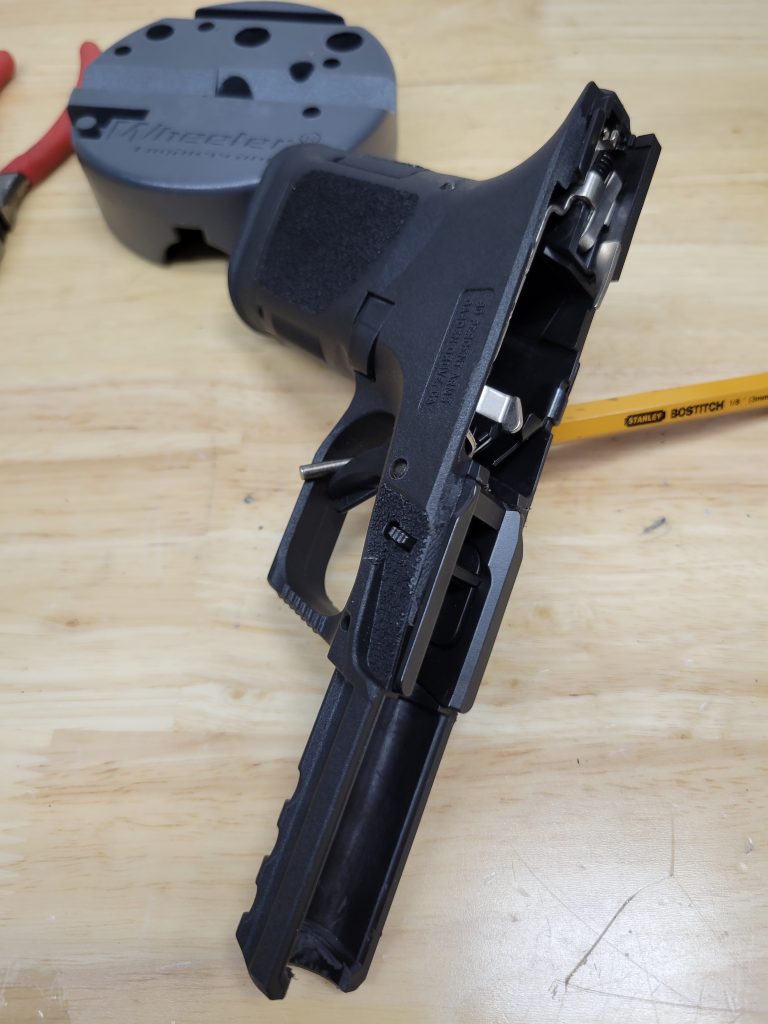
Another difference was the Mod 1 rear slide rails that come with the frame were not one piece like in the videos. They are two separate pieces. I simply put them in place after the trigger assembly went in. Other than that, the entire assembly went together in less than 30 minutes. In all, completing the frame took less than an hour.
If you look closely at the picture below, you will see that I still haven’t cleaned up the burrs from the removal of the cross frame member. I am holding off on that until it is time to fit the barrel and slide. I will clean that up and smooth things out with a Dremel and a fine round file when I go to fit all of that together.
Here is a second video that may help you with the assembly.
So far, the cost of this build has been the frame at $150, plus the lower parts kit at $60, for a total cost for the assembled frame of $210. I have $640 remaining in the budget for this build.
As usual, I will remind everyone that I receive no compensation for using the parts and suppliers that I use, and that I have no relationship with them, other than being a customer. All prices paid are the same available to anyone else in the public.