Load Shedding

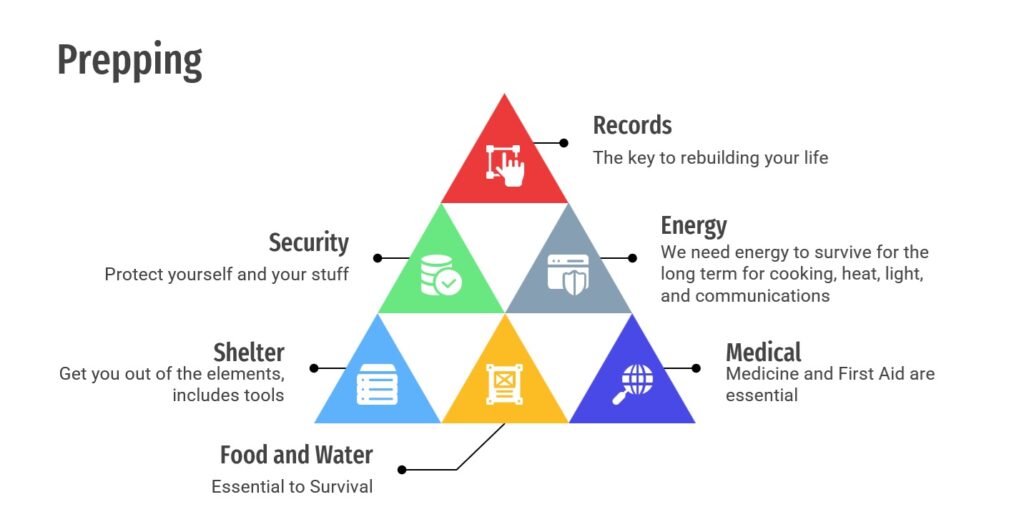
Prepping is more than just staying alive, it’s about thriving and preserving your life to the greatest extent possible. Many of the other things that we rely on for survival rely upon energy. We use it for a lot of things- heating, cooling, light, communications, all sorts of the things that we use rely upon energy. In some parts of the country, heat is important. Here in Florida, not so much. What we need is energy for cooking, light, air conditioning (summer heat will kill you more than our mild winters), communications, and other things. It’s on the prepping pyramid.
If you have read this blog for long, you know that two years ago, I added a backup power supply for the house. That supply consists of solar panels and a pair of Powerwall3’s to run the house when we aren’t making enough solar energy. One of the biggest limitations is battery capacity. Now that the tax refunds are no longer available for solar and battery installations, we need to make the ones we have last as long as possible. Adding more battery power in the form of another Powerwall would be great, but it’s a fairly expensive option. So we need to stretch what we have. That is, we need to match the loads being drawn to the energy provided, and do what we can to stretch battery charge to last as long as possible.

That’s where load shedding comes in. My early attempts at load shedding involved turning off breakers, and I even tried an Aquanta water heater switch, but it was nonfunctional garbage and I returned it.

I have a Synology server that’s already running Home Assistant, and this seemed like the way to go. I tasked Home Assistant with shedding loads. A home battery can keep the lights on during an outage, but its useful runtime depends heavily on what the house asks it to power. Instead of treating every circuit equally, this project gives Home Assistant a clear set of priorities: preserve essential comfort, shed discretionary loads in stages, and put daytime solar energy to work whenever it is available.

The system uses live Tesla Powerwall data and watches whether the house is connected to the grid or operating as an island. It also monitors battery charge, solar production, household demand, and real-time battery flow. The guiding principle is reliability: each Home Assistant automation has a focused job: important decisions require stable sensor readings, and loads are restored gradually rather than all at once.

At 80% battery, the upstairs air conditioner turns off. At 70%, the electric water heater is shed. At 50%, the main-floor air conditioner moves to a 80°F setpoint, and at 35% it shuts down. This preserves the 10 kWh of power for network and security services, lighting, and refrigeration. A critical warning is sent out as a push notification at 15%.

The most interesting part happens when the sun is shining during an outage. Loads are not restored merely because the battery percentage rises. The system first confirms sustained battery charging, then adds one load at a time with a stabilization period between each step. The main-floor HVAC returns first, initially at a conservative setting. Normal main-floor comfort follows when more energy is available, then the water heater, and finally the upstairs HVAC.

The 4,500-watt water heater stores hot water when a storm likely to cause a power outage is approaching. When the Tesla Powerwalls activate Storm Watch and the home is occupied, grid energy preheats the water in the tank even if the normal schedule would have it off. During an outage, strong solar surplus can also heat water instead of allowing energy to go unused. This function is controlled by a Aeotec smart switch that allows both switching and monitoring of the energy delivered to the water heater.

Near a full battery, Tesla may curtail rooftop solar because the Powerwalls cannot accept additional charge. That makes ordinary surplus measurements misleading—the panels may be capable of producing more, but they have been told not to. To capture that energy, the automation can briefly test the water heater at 95% charge. It keeps the heater running only if measured battery flow shows that solar can support it; otherwise, it shuts the heater down and waits before trying again.

Grid restoration receives the same cautious treatment. Utility power and normal Powerwall status must remain stable for 10 minutes. The main-floor HVAC returns first, the water heater is reconciled with its schedule, and the upstairs HVAC follows later. Staggering the sequence avoids a sudden surge and reduces the chance that unstable utility service will cause equipment to cycle repeatedly.

I also have a “vacation mode” that is initiated by a simple virtual switch on the HA dashboard. Activating that turns off the water heater and sets both HVAC units to 79 degF. That level allows the HVAC units to maintain a relative humidity of less than 55%, which is a good way to minimize mold growth.

We recently spent 5 days in Maine shutting down the BOL, and the house only averaged 31 kwh per day while we were gone. Normal power usage in the summer is about 70kwh per day. Since we generate about 47 kwh per day from solar, I think this is a doable system, but I will have to add some panels in the future so we can have a little more breathing room for cloudy days.

When we are in routine operation, the system turns the water heater off from 11pm to 5am, then Monday through Friday, again from 9am to 2pm.

The result of all of this is not simply a collection of “if battery is low, turn something off” rules. It is a small energy-management system built around priorities, measured power flow, and graceful recovery. In this way, I maximize the power and battery capacity I have available.
Done Stamp

The closet organizer is done. I secured 3 pieces of 3/4 inch plywood to the wall, spanning 6 studs. They are attached with 52 two and a half inch screws- one screw every 16 inches whenever the plywood crosses a stud.

This is a rail mounted closet organizer. There is a screw through the rail whenever it crosses a stud, and a 1/4×20 elevator screw in between those screws, so that no section of rail is unsupported for more than a foot. Then the system is hung on the rail. I’m fairly certain that will hold it. I painted the plywood to match the wall, and now it looks great. One project complete. Including waiting for parts, it took just over a week.

The camera system should be done tomorrow. That project took 4 days of solid work during the day.

For those asking what cameras I chose, there are two types.

For fixed cameras, I bought five Lorex E842CD cameras. They are 8mp cameras that I placed in the central room of the house, the pool, the rear lanai, over the driveway, and at the front door. I am moving away from smart doorbells because it would have to connect via WiFi, and I want a wired setup.

I also added a PTZ camera. I wanted one with a good optical zoom, so I can see things at distance with clarity. I chose the Amcrest IP8M-2899EW. Like the fixed cameras, it’s also 8mp. It has a full 25x optical and 16x digital zoom. Using this camera, I can read license plates at 200 yards and the expiration sticker on them at 100 yards. It has built in AI that performs facial recognition. Don’t ask me how that works, because I haven’t played with it yet.

All of the cameras are attached to a RAID comprised of three 10tb HDDs inside of a Synology RS1221+ running the Surveillance Station software. That RAID gives me at least 60 days’ recording capacity.

At this point, I will be making minor adjustments to settings and things like that. I also need to learn to use the software, so I will be playing with that some. All in all, I have a good system that allows me to control my data and I won’t have to pay subscription fees to anyone.

The firewall keeps the cameras from connecting to the Internet. The VLAN rules only permit the cameras to talk to the disk station. That protects me from cameras that can be hacked or used to spy on my data.

Installing it required a couple of network changes, but I will lay out my final network in a post coming soon.

Cameras

As any of you who are regular readers here know, whenever I undertake a major project, I always debate, design, and document the dog doo-doo out of it. (Sorry, I just liked the alliteration in that sentence) Remember the solar project?

I had a cheap camera system in my old house. One of those where you run cables to the cameras and they save to a hard drive in a dedicated DVR. When I moved to this house two and a half years ago, we transitioned to Ring cameras. I regret that decision for the following reasons:

  • The cameras send their video to the cloud
  • The cloud is just a word meaning “someone else’s computer”
  • This means you don’t own the data, and Amazon does all sorts of stuff with it.
  • The quality of the pictures is only slightly better than filming with a potato

Even though none of the cameras were inside the house (when we went on vacation, we temporarily put cameras in the house), I still don’t like other people having my data or pictures of my house. Since I installed an entire network worthy of a small office building. Why not use that to increase surveillance?

Infrastructure

For those reasons, I wanted to get a new camera system that overcame these deficiencies. I wanted this system to have:

  • 4k video
  • Enough storage for 30 days of video retention
  • Wired cameras, no wifi

What I decided on:

  • Ethernet cameras
  • recorded on the Synology RS1221+ that’s my network storage. That server holds 8 HDDs. I have it set up with a pair of RAIDs, one for my data, and one for recording camera video.
  • The camera RAID is composed of three 10 TB HDDs giving me about 18TB of storage space
  • That 18tb of space is enough for six 4k cameras recording 24/7 for about 60 days
  • Software is Surveillance Station, which allows 2 cameras before licenses need to be purchased for more

My plan is to have six cameras covering the property.

  1. general surveillance camera covering the front of the house
  2. another on the back porch
  3. one viewing the back of the house and the pool
  4. one that views the kitchen/living room
  5. a PTZ camera on the front of the house. This camera will have a 25 or greater optical zoom to allow distance viewing without losing too much resolution.
  6. Doorbell camera (this one will have to be WiFi)

Two of the cameras already had Ethernet wires running to them: the one on the back porch went in quickly with no issues. The one covering the front of the house did as well, but even though it was receiving POE power, no connection. I thought it was a faulty cable. It turns out the construction workers who installed the wire got the RJ45 jacks installed wrong. That was quickly taken care of. That gave me two cameras right away.

I went into the attic to run more ethernet cables and discovered that isn’t going to be possible. The header for the wall where the server is just isn’t accessible from up there. I do have an Ethernet cable run to both the front and back of the house that was put there when the house was built. I realized the best way to do this is to use those cables as a trunk that feeds a managed switch. These two switches will allow me to branch those trunk lines into an AP and a camera.

That’s exactly what I did.

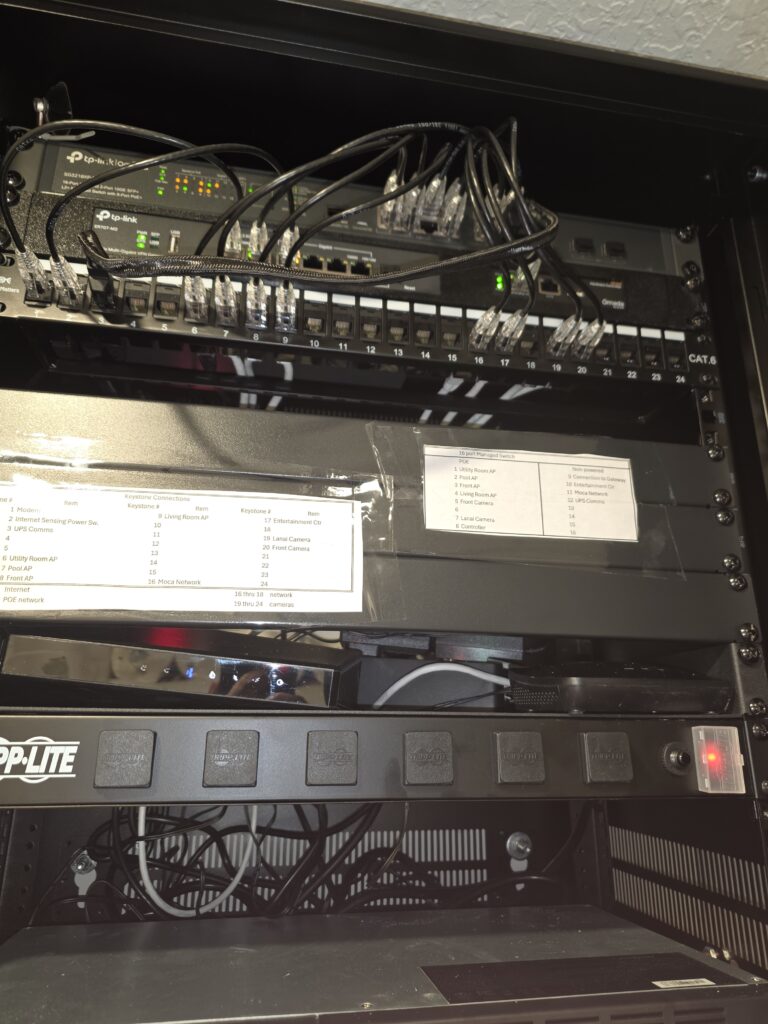
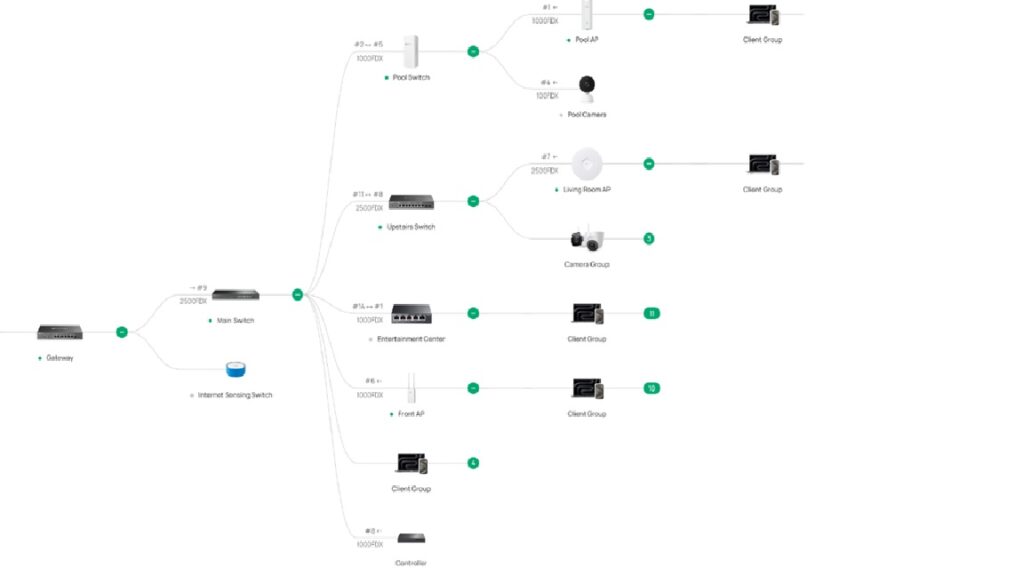
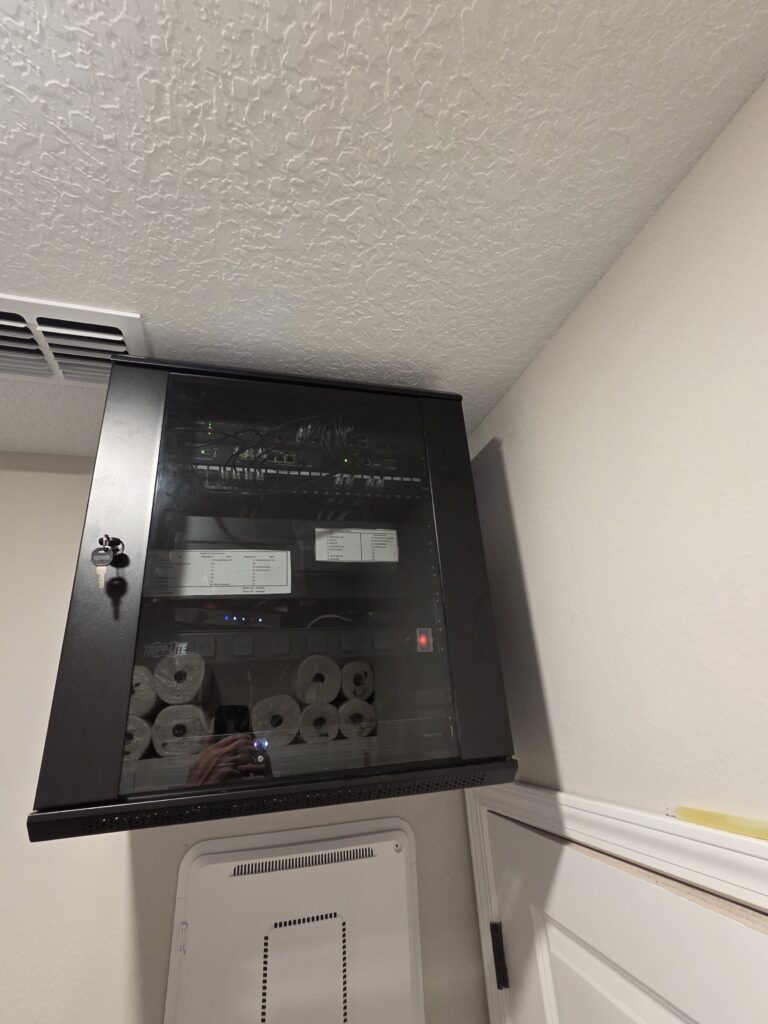
This involved expanding my network. My network became a server cabinet that carries most of the Internet, but also required several edge switches to serve other clients. It looks like this:

             Core Switch
                     │
    ┌────────────────┼────────────────┐
    │                │                │
    ▼                ▼                ▼

Entertainment Pool Switch Front Switch

From there, it is easy. Wire the cameras in, and instruct the local (edge) switch to place the camera in the surveillance VLAN, the AP in the management VLAN, etc.

The entire project of Internet and cameras has gotten larger and more expensive than I planned on. I’m going to sit here on just the two cameras until next month, then install the doorbell and pool cameras. The PTZ camera will be last, simply because it’s the most expensive of them. That means I am on sort of a hybrid system at the moment, with two of my own camera and several Ring cameras.

Work in progress.

EDITED TO ADD

In case you haven’t caught on, I try to do a major project each year to improve my position. The first summer we were in this house, we added solar and Powerwalls so we would have backup power. The second summer was the pool, screened in lanai, and hurricane hardening. This summer is a two-fer. One of the projects is the network/camera project, the other is one that makes me far less happy. More on that later.

BOL no more

In 2015, I began stocking a cabin in Maine as a BOL. I had cached weapons, a boat, and a buttload of supplies there. All we had to do was get there, and we had enough supplies to get by. That is no longer the case. The caretaker of the facility passed away last year, and his wife has remarried. The new husband is not nearly as reliable, and is also a liberal. I no longer consider that location to be viable as a BOL.

I am making plans to head up there to retrieve most of our supplies, and we have decided to sell the boat, rather than drive up there to haul it all the way back. It’s more economical to sell it there and perhaps purchase a replacement down here.

Flooded

This is a story of me afro-engineering a solution to some flooding that happened to my rear lanai. Now that there is a pool behind the house, what was our back porch has been closed off by an electric hurricane screen. There is some outdoor furniture and a TV in there, and it now serves as a sort of “Florida Room” and a place to store outdoor items when a hurricane comes. More on that in a different post.

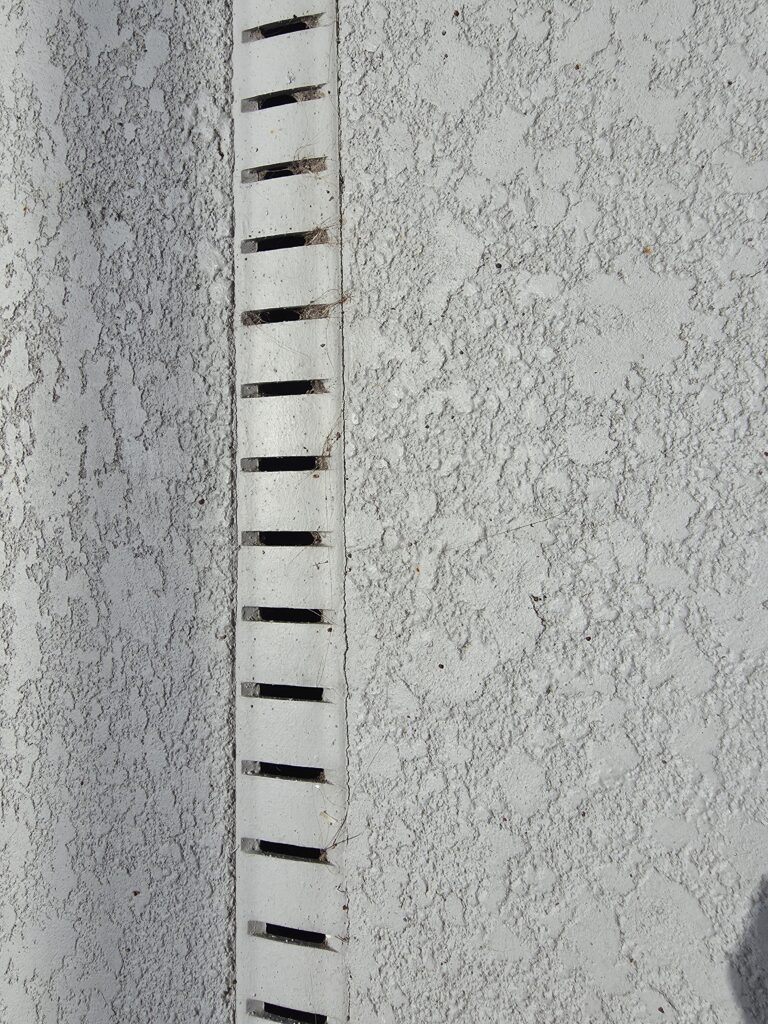
We had a thunderstorm come through on Saturday, and it was a fairly strong one. We got just over 3 inches of rain in less than 45 minutes. That caused a bit of an issue. When we put the pool in, the contractor put a drain in place that lies at the end of the pool deck closest to the house. It looks like this.

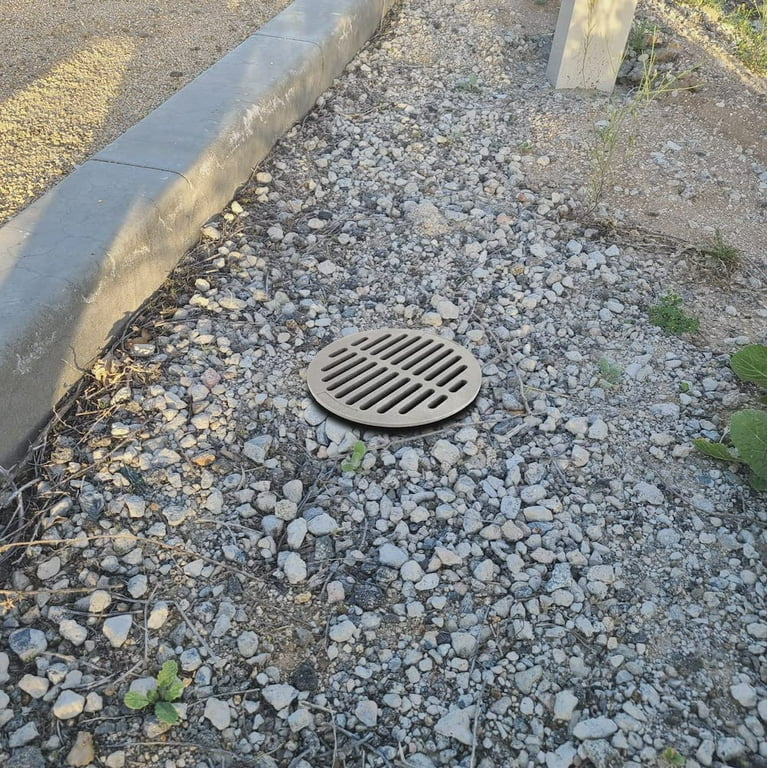
That is just a slot in the concrete about 2 inches wide and 4 inches deep. It discharges on both sides of the slab. Right above where that discharges, the downspouts from the gutter discharge. I dug a trench at that point, and ran a 4 inch corrugated pipe that runs about 20 feet back from the house. At the end closest to the house, it looks like this (pictured is not mine, it’s from the Internet):

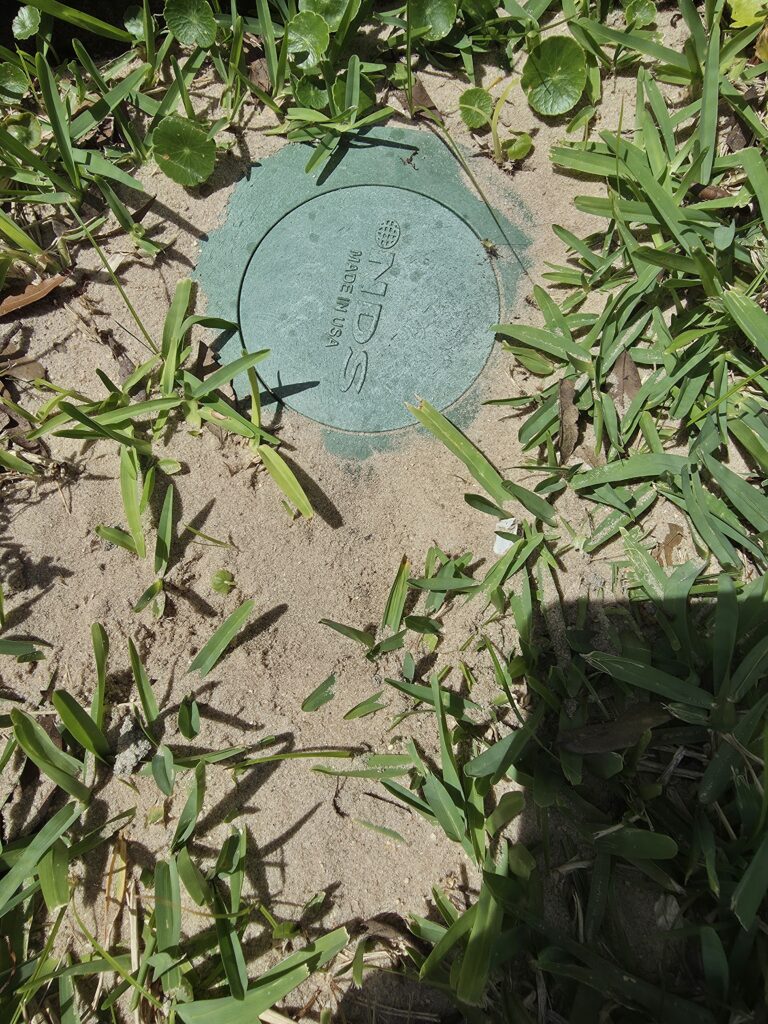
The discharge was one of these valves.

When the pipe fills with water, the weight of the water causes the valve to open. Well, as near as I can tell, the rain was coming down so hard that the drains were quickly overwhelmed, the area near the inlet to the drain pipes was soon underwater, and this caused a backup that flooded my rear lanai with about an inch of water. The rug out there was saturated, but luckily it’s an outdoor rug, so a couple of hours and a fan soon dried it out, no harm.

While it was raining, I went outside to see what the problem was. It had been so long since we had gotten any real rain, everything was clogged with dead oak leaves: the downspouts, the intake drains, all of it. So I cleared the leaves out, but that didn’t help a lot, and got me bitten on the hand by a rather large, angry spider that had been nesting in the leaves.

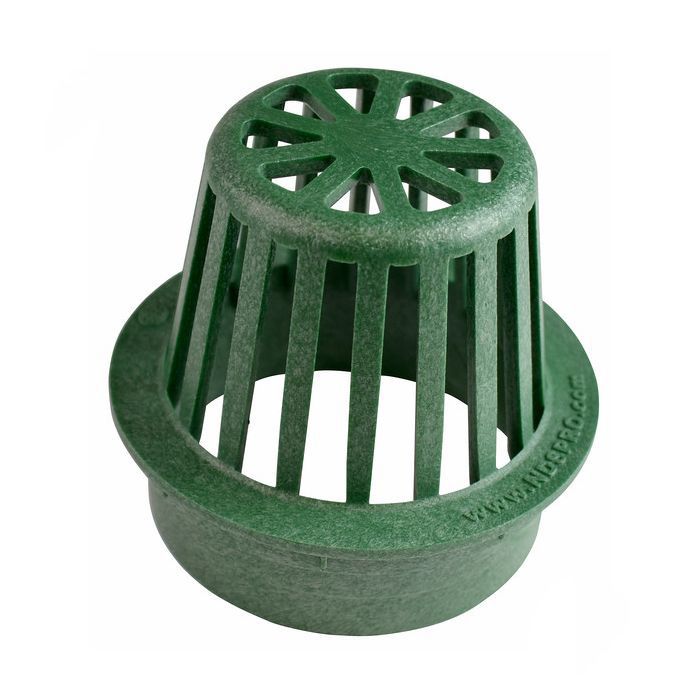
I spent Sunday digging up the ends of the drain pipe, and I replaced the intakes with this:

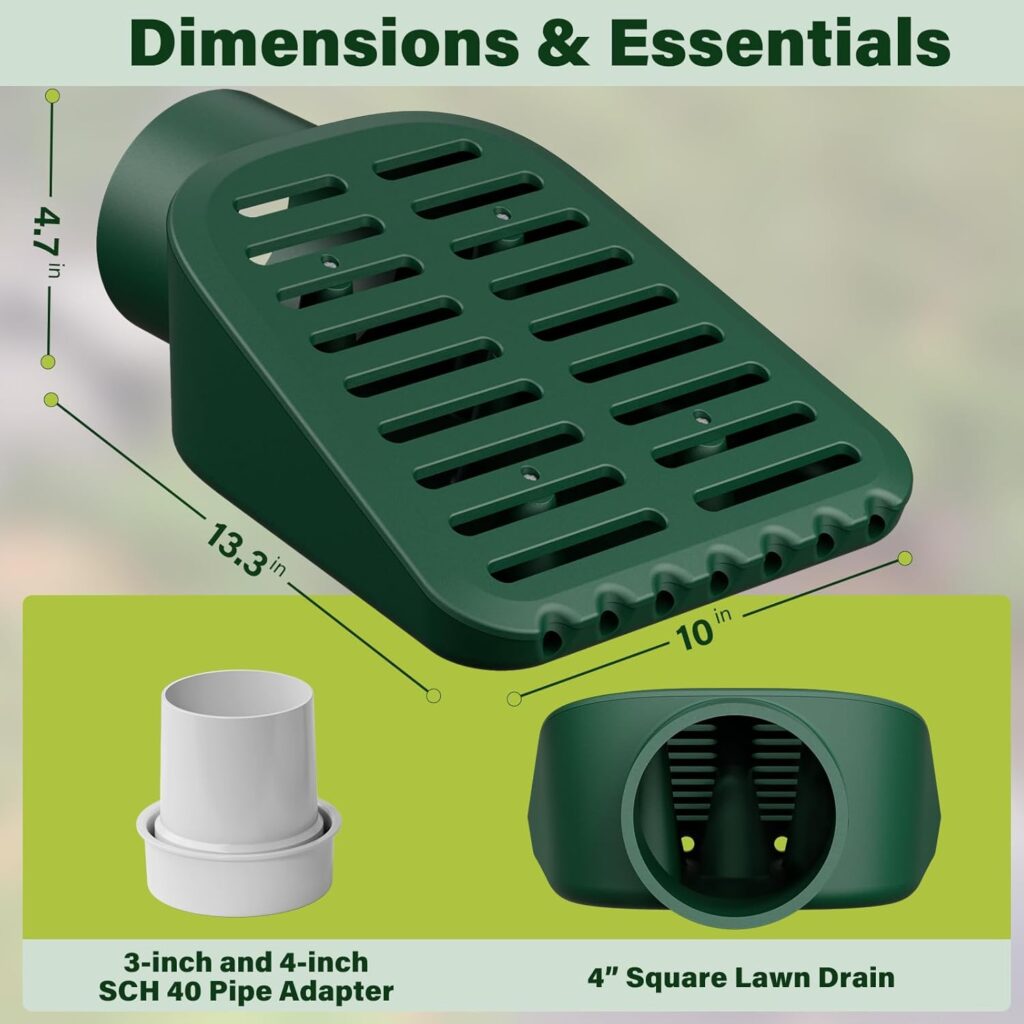
Since it is taller and not flat like the old ones, the hope is that this grate can handle more water AND is not likely to be clogged with leaves. Then I also replaced the discharge valves with these.

I am hoping that this will be large enough to allow more flow through the pipe. According to my math, a 4 inch corrugated pipe that is 20 feet long with a 1 inch drop every ten feet should be able to move about 75 gallons per minute. I have two of them (one on each side of the house) so I should be able to drain about 150 gpm.

Also according to my calculations, a rate of 3 inches of rain in 45 minutes is about 30 gallons per minute. This system should be able to keep up now, if I can keep it free of leaves. I guess we will find out next time we get a good rain, which in Florida is about once a week or so.

Keeping water out of the house is important, and no all prepping is sexy. Hope this helps someone else.