It’s arts and crafts day here in Sector Ocho. Read on for today’s project.
You will recall that Liberty safe is in possession of a backdoor code for their electronic locks, so I was looking at getting a new safe. I seriously considered getting a Champion safe. Since we are in the middle of gearing up to move, the nearly $7,000 price tag for a new safe just isn’t in the cards right now. It isn’t like my valuables aren’t worth it, I just can’t spend the cash right at this time. Still, something needed to be done.
It isn’t that I think that the lack of a backdoor will keep the FBI out of my safe. Let’s face it, the government has virtually unlimited resources. If they want in, they will get in, backdoor or not. The fact that a backdoor exists at all is where I have a problem. With all of the data breaches in the news, the mere existence of a backdoor is a significant liability. Some loser buys the safe backdoors on the Internet, and thanks to a data breach, now has my address and the backdoor combo to my safe. No thanks.

So I decided that I would replace the Sergeant and Greenleaf electronic lock on my safe with a Sergeant and Greenleaf mechanical lock, model 6730. The advantages:
- The lock has a combination that can be set or changed by the user
- Since it was the same make as the electronic lock, it fit without further modification.
- There is no backdoor combination for mechanical locks.
- The lock cost less than $100
The disadvantages:
- The safe can’t be unlocked in the dark
- Mechanical locks are slower than electronic locks.
Florida’s hot weather finally broke this week, so I could work in the garage without dying of heat exhaustion. (It’s routinely over 102 degF in my garage during the summer.) That means it was time to change out the lock. The entire job took slightly over an hour. It would have been faster, but my wife called me on the phone twice while I was doing it. Still, pretty easy. I started by pulling out the old electronic lock:
- Four screws held the inner wall of the safe in place. Off it came.
- I clamped a set of vise grips on the door frame of the safe to make sure I didn’t shut the door and lock myself out by mistake.
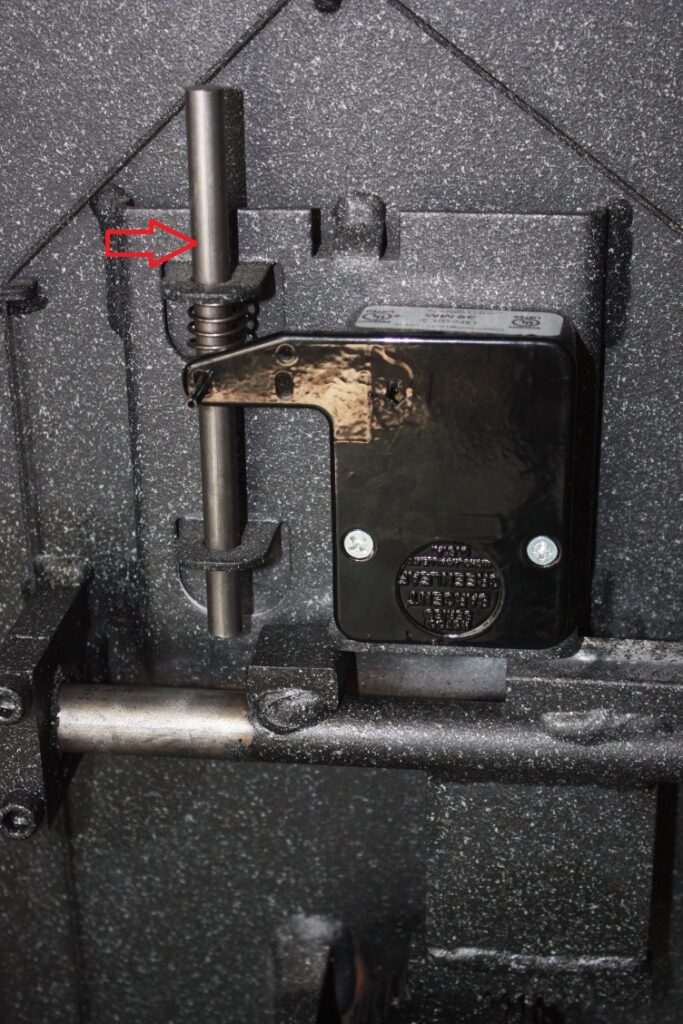
- I clamped a second set of vise grips onto the relocker* (marked with red arrow in photo, above) to hold it in place
- I undid the four screws on the old, electronic lock and removed the cover plate and relocker bar.
- I unplugged the leads from the keypad where they plugged into the lock
- There were 4 screws holding the lock in place. I removed them, and the lock from the door.
- I removed the keypad from the front of the safe door.
Now I was ready to install the new lock. I followed the video that I found on YouTube.
A couple of notes here.
- I don’t have a dial ring alignment tool. It didn’t matter. I did it by eye and it worked just fine.
- I didn’t install the plastic bushing that the lockset uses for a bearing. That means my dial doesn’t turn very smoothly. I will have to take it all apart and install it, but I want to have a new slipway key before I try it, just in case I ruin the one that is in there in the disassembly. That means a trip to a locksmith for a new one.
- I used a Dremel with a cutoff wheel to cut the dial spindle. It worked great. I clamped the dial in a vise, and cut the spindle off by hand, then used a flat file to bevel the end of the spindle.
The hardest part was setting the combination. I had to do it three times before I got it right. I don’t know why I had trouble, but it was probably an I-D-ten-T error. I finally got it right.
After I set the combination, I tested the lock by locking and unlocking the mechanism four times before I trusted it enough to close the door. Now there is only one door (the front door) to my safe, and I am the only one who knows the combination. When my wife gets home, she will be the second person.
On a side note, I will soon have an SG electronic lock for sale. I think (but I am not sure) that the backdoor for each safe is unique to that safe. Since the lock won’t match your safe’s serial number, your safe may not be subject to a backdoor attack. However, I wouldn’t count on it. For all I know, the backdoor is 1-2-3-4-5, like an idiot would use on his luggage.

footnotes
* the relocker has one job. If you look closely at the lock, you will see that it works by inserting a locking bar into the transfer bar of the bolt works, preventing it from opening. Dialing in the correct combination withdraws the locking bolt and allows the bolt works to function. Removing the lock will also allow the bolt works to function. A burglar can punch the lock out and gain access to your safe. A relocker prevents this from happening. Look at the photo, and you will see that removing the lock causes the relocker to drop down under spring tension and prevent the bolt works from operating.
Also, my thanks to Mel Brooks for making Spaceballs, one of the funniest movies of all times.
1 Comment
Elrod · September 30, 2023 at 2:37 am
Congrats. Pro Tip: Check the relocker for burrs caused by the vise grips. If there are burrs the relocker may bind on them and not activate properly.
As for electronic locks, I am perplexed as to why anyone would ever want one on a safe; sure, they’re faster than mechanical locks, but mechanical locks have been around since……well, since safes were invented, so they have a track record. E-lock problems are legendary (ask Michel Bane about his experience). And mech locks don’t have back doors.
FYI, extra points for using the key that came with the lock to lock the dial in the 0 position when locked. Adds degree of difficutlty to unauthorized access. Not a lot, but some.
RE: the “can’t use in dark” thing – take a look at the Streamlight 14032 Sidewinder – it “flexes” 90 degrees so it will lay on top of the safe with the head angled straight down so it’s pointed right at the lock. You choose the default light color – red, blue, white or IR – and whatever you’ve selected always starts at the low setting; button presses advance the light to maximum. It’s designed for use in combat situations so it’s pretty idiot proof once you learn where the button is, the on/off button is large and works OK with gloves. A pair of stick-on velcro pads will keep it in place if you have a habit of setting stuff on the safe and bumping it. Mine’s set to red, but IR works with NODs if you have them (I almost never wear NODs around the house…./sarc). Battery life (it uses 2X AA) is excellent.
Comments are closed.