I am not an IT expert by any stretch of the imagination. Still, I am doing OK with this server upgrade. Some of these concepts are new, some not so new. Still, I am doing alright with the upgrades. I spent the day installing some upgrades.
Mounting
I first tried to mount the cabinet, but it was designed for studs that are 16 inches on center, and my walls have 24 inch stud spacing. I cut me two 1×6″ Spruce boards 26 inches long. I drilled them for screws to attach to the studs, and also drilled 5/16 holes 16 inches apart, then I drilled a countersink centered on those holes. Those holes fit a 5/16 bolt and washer. I painted the boards to match the wall, then attached them to the studs with 4 #8x 3″ wood screws at each end of the board.
Now I had two boards spanning the studs with 5/16″ bolts sticking out that matched the mounting holes on the cabinet that allowed me to bolt the cabinet to them.
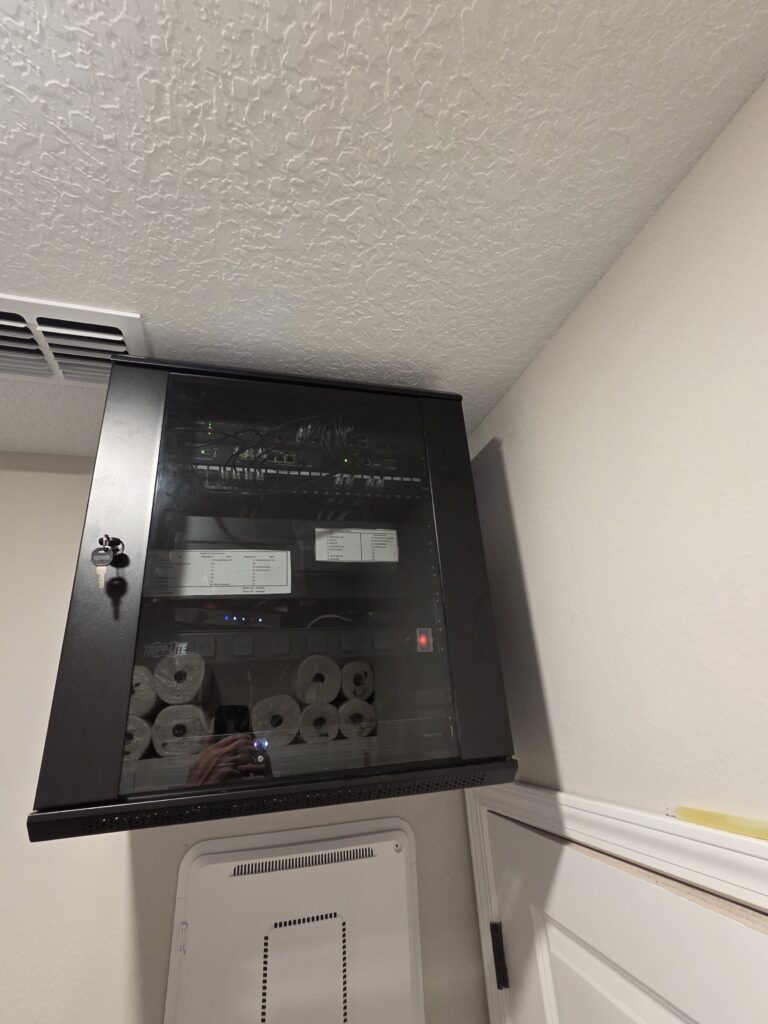
If you look below the cabinet, you can see the old onQ panel this cabinet is replacing. Once all is done, I will remove it and drywall over the hole. Yeah, the reflections in the glass show the toilet paper and paper town reserves I keep on top of the laundry room cabinets.
Installing Equipment
I put a thermostat in the cabinet that will control the exhaust fan. Then I attached my devices to the racks:
- 12U Omada SG3218XP-M2 POE managed switch. This is the main switch for my network.
- 11U Omada ER707-M2 gateway & OC220 Omada controller
- 10U Keystone 24 pin patch panel. Ports1-5 are reserved for Infrastructure connections like modem, UPS, Moca, 6-15 are for POE devices like AP’s, 16-18 are for non powered devices, and 19 thru 24 are for cameras
- 9U is a SG2210XMP, currently an unused switch but I plan on having it be the switch for my future IP security cameras
- 8U, 7U, 6U are open.
- 5U is a shelf with a Moca unit, the modem, and a switch that cycles power to the gateway and modem in the event it cannot access the Internet
- 4U is a power distribution unit
- 3U and 2U are currently vacant, but will have a Synology RS1221+ as a storage drive and for future cameras
- 1U is a 500 watt UPS. I know it’s small for what I am powering, but I am only using it to bridge the second or two that it takes my Powerwalls to take over when grid power fails.
I got everything wired and labeled. The network is fully functional and stable, and the entire thing went as smoothly as I could have hoped. It took me longer to mount the cabinet on the wall than it did to get the network up and running. I now no longer have a home level network. This is bordering on prosumer level stuff.
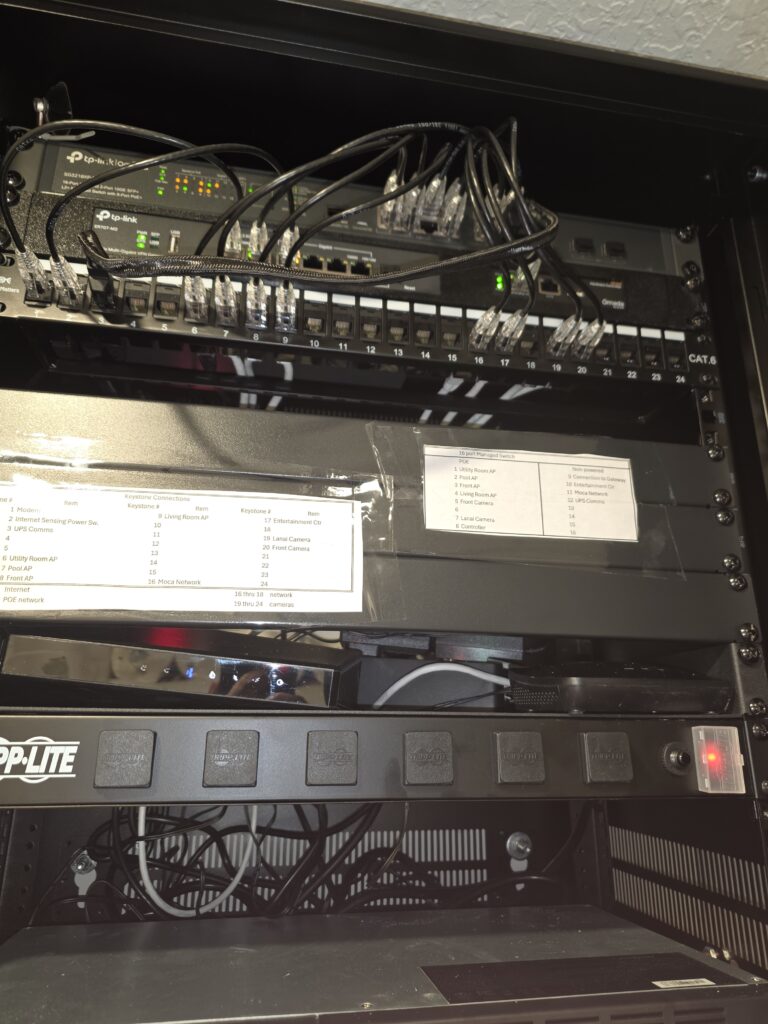
You will note the empty slots for the second switch and the double drive server. Im waiting on parts for those. I will also neaten up the wires a bit.
Setting Up Virtual Networks
The last thing I did today was set up several VLANs:
- Management, VLAN 10
- VLAN 30 for IOT devices.
- Servers, VLAN 40
- Guest Network VLAN 50
- Security Cameras, VLAN 60
To verify that it works, I logged in to the guest network SSID and was assigned an IP of 192.xx.50.x. I haven’t created rules yet, just wanted to make sure I did it correctly.
Moving Forward
Tomorrow, I will install the disk server, a Synology RS1221+. I don’t have disk drives for it yet, but that’s coming. Once that is installed, I will begin to place devices and clients into the various VLANs. Once that is sorted, I will begin assigning rules. One step at a time.
I am not planning on working on or installing cameras until the weather cools enough for me to get in the attic and run more Ethernet cables, so not until at least October or November.
0 Comments